Getting your images off your phone or out of your camera can be easy but also can be a challenge depending on your intentions. Today computers all come with software that allow you to store, view, share and even edit your photos. This software is great for basic purposes but has limitations if you want to edit in a stand alone program such as Photoshop or email full size files using your mail program. This discussion is about getting your photos to your computer without using the photo software that comes with the computer. This is especially important if you are planning on using these photos for business purposes such as making a printed brochure.
Everyone is using smart phones so lets talks about getting the photos from your camera phone to your computer. We are not going to use software in your computer such as the photo app in Window 8 or iPhoto on Mac computers. I have found with many people these programs make it more difficult to find the images should you want to edit or email them as full size attachments. I recommend that you create a folder for these pictures on your computer but the first thing you should think about is where on the computer are you going to put this folder. Is it inside another work folder; on the desktop or in the folder called My Pictures? The correct answer is where it is easiest place for you to locate. Once that is decided you then create the folder and name it. I like to place folders on my desktop to make it easy to find while you are working. I move the folder later to where I want to keep it stored.
Before getting started you should plug your phone into the USB port on your computer using the supplied cable that comes with your phone.
For illustration purposes we will use a Windows 8 laptop. We are putting a folder to the desktop. (To get to the desktop click the “desktop” button on the main Windows 8 screen).
Once on the desktop open File Explorer by using the button at the bottom on the left. 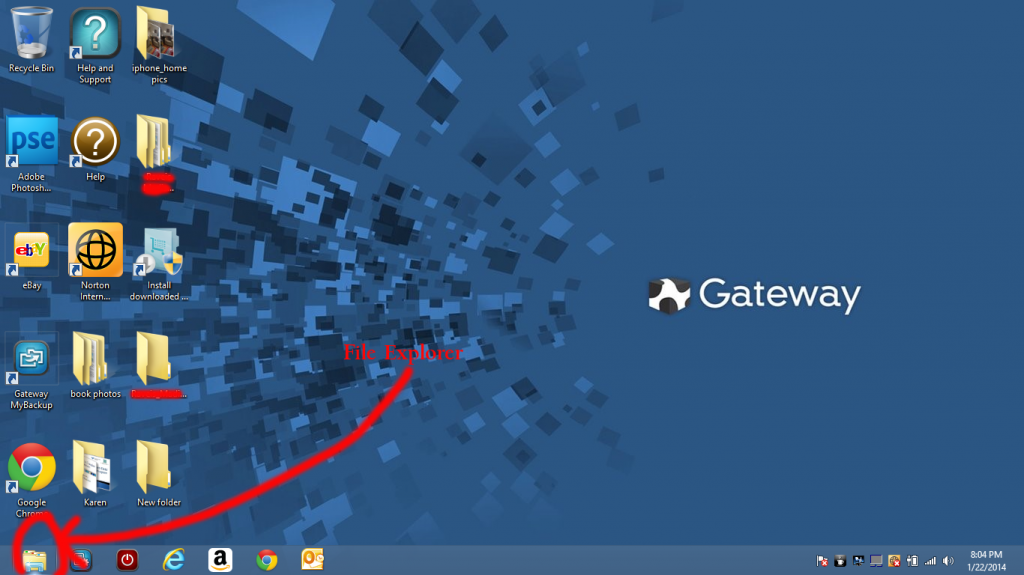
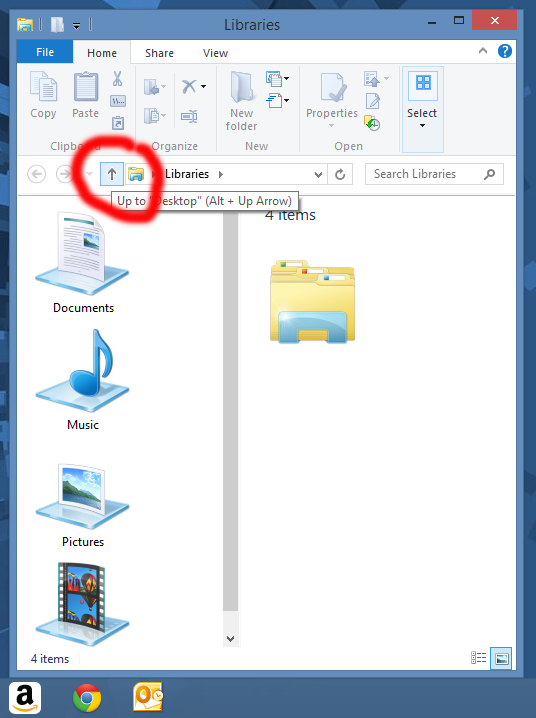
You will get a window as below.
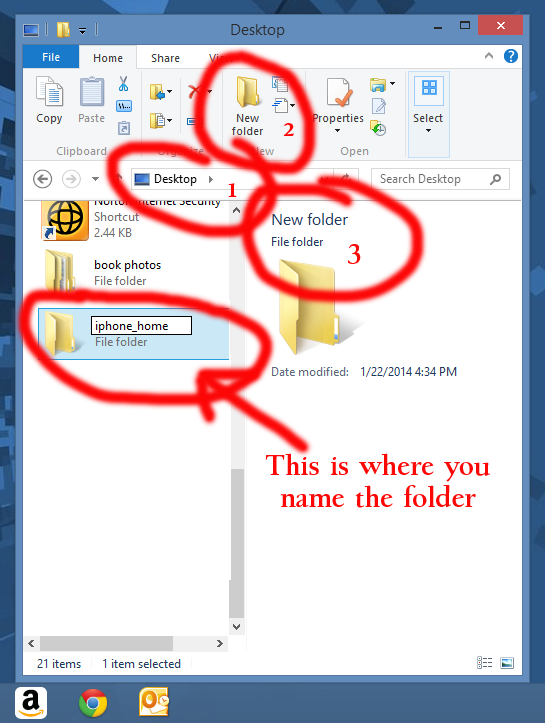
Use up button to get to Desktop. Once there do as follows:
1. Click “New Folder” found near the top of that window and you will see a new folder ready to name appear on left side of that screen.
2. Name folder
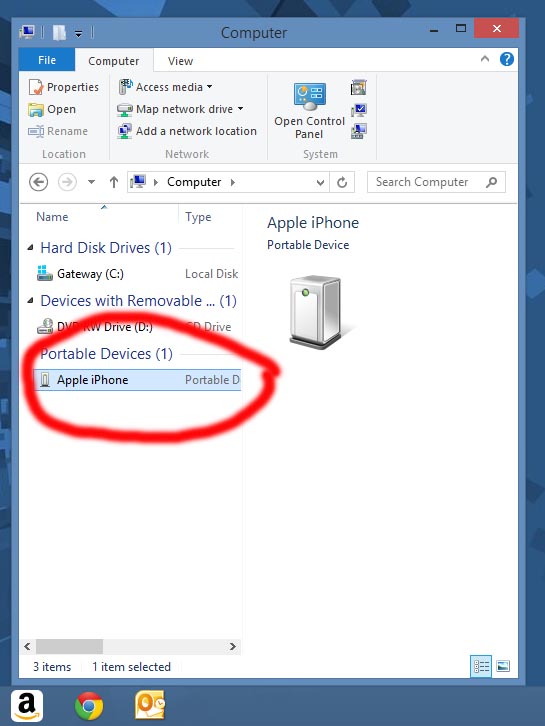
3. Scroll up inside the screen until you see “Computer” and click to ope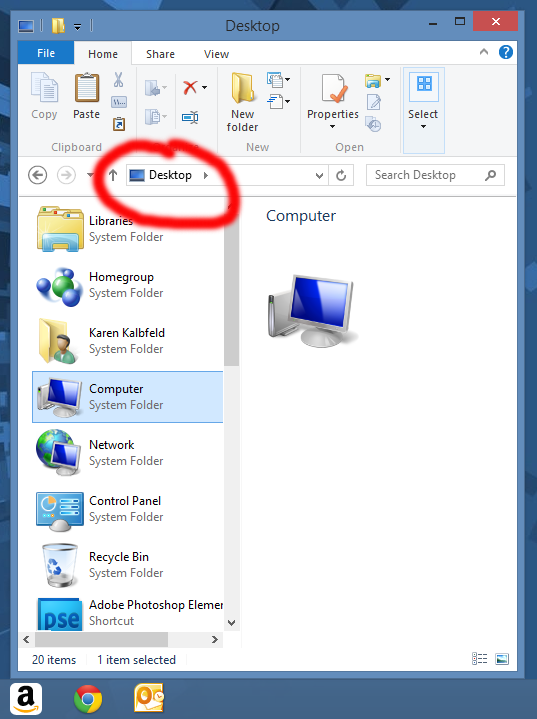 n
n
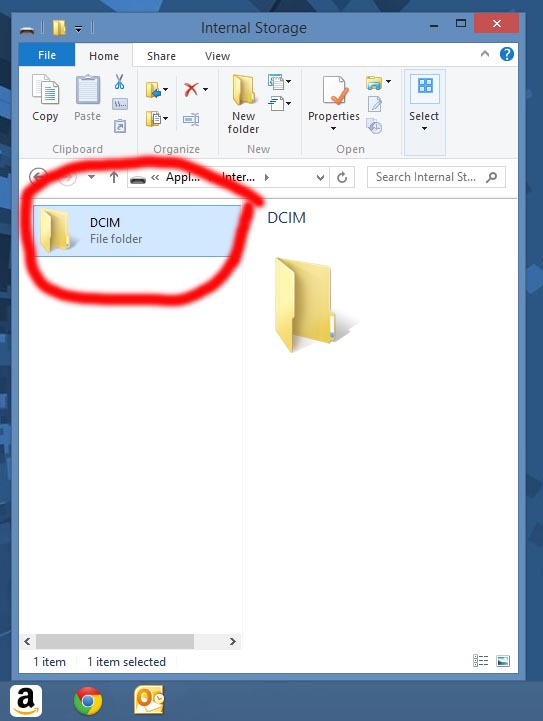
4. You will get a screen as below and open the portable device named by your phone.
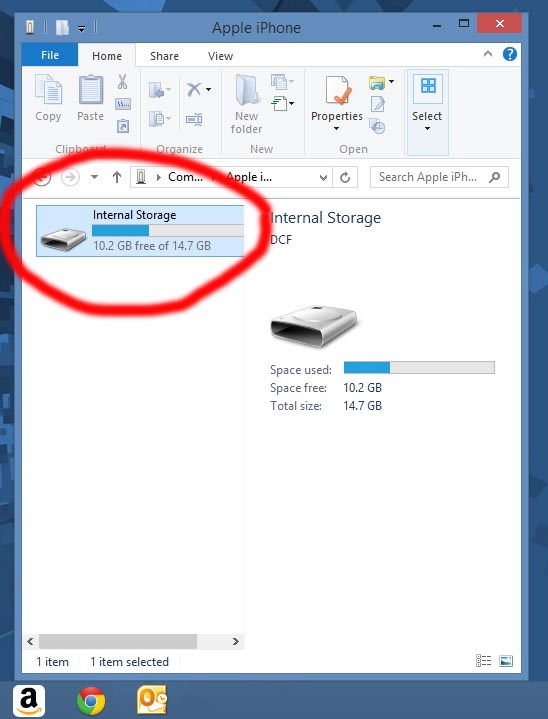
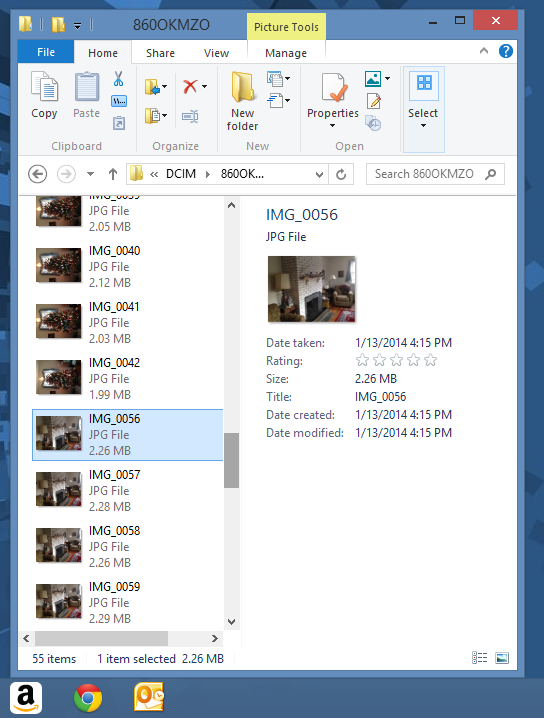
5. Keep clicking to open until you get to a window that contains your pictures.
6. Find the pictures you want by using the scroll bar.
HINT HINT HINT, write down the files numbers while viewing them in your phone before even starting to make them easier to find.
7. Click and drag the pictures you want in the folder.
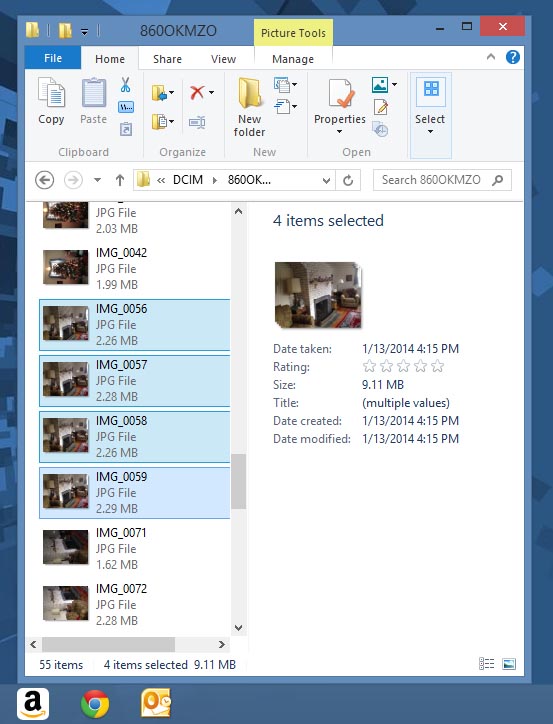
8. To move a series of pictures, click the first one then while holding the “Shift Key” click the last pic in the series.
9. Click one of the highlighted files (pictures) and drag them to your newly created folder.
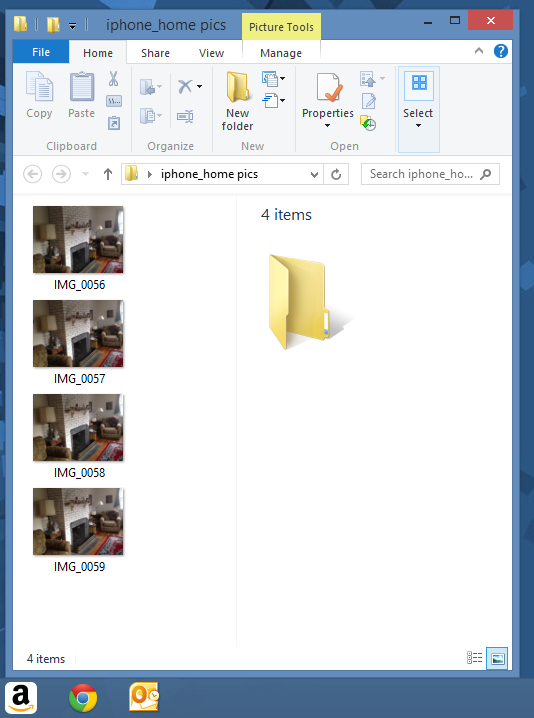
10. Double check that your pictures are there by double clicking on the new folder you created. Once you have the pictures here you can send them as attachments just as you do other files.

